
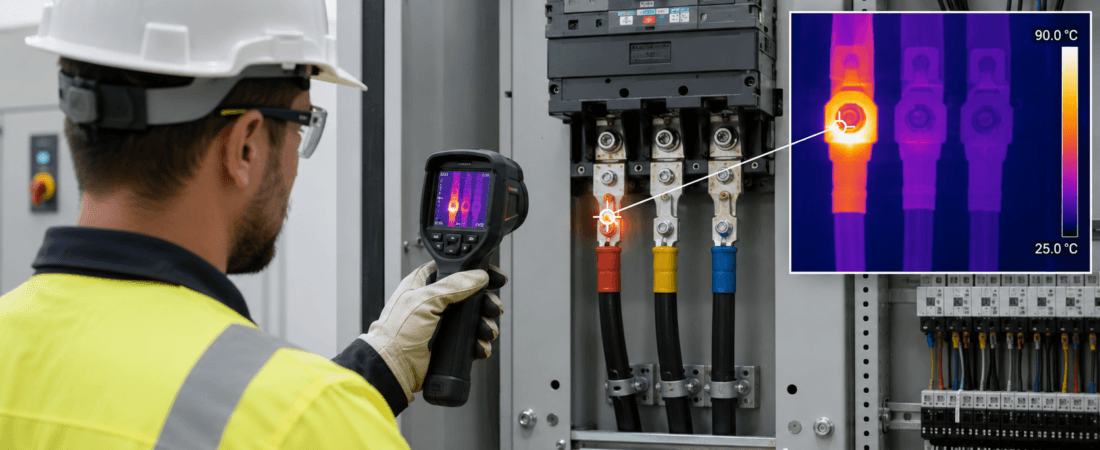
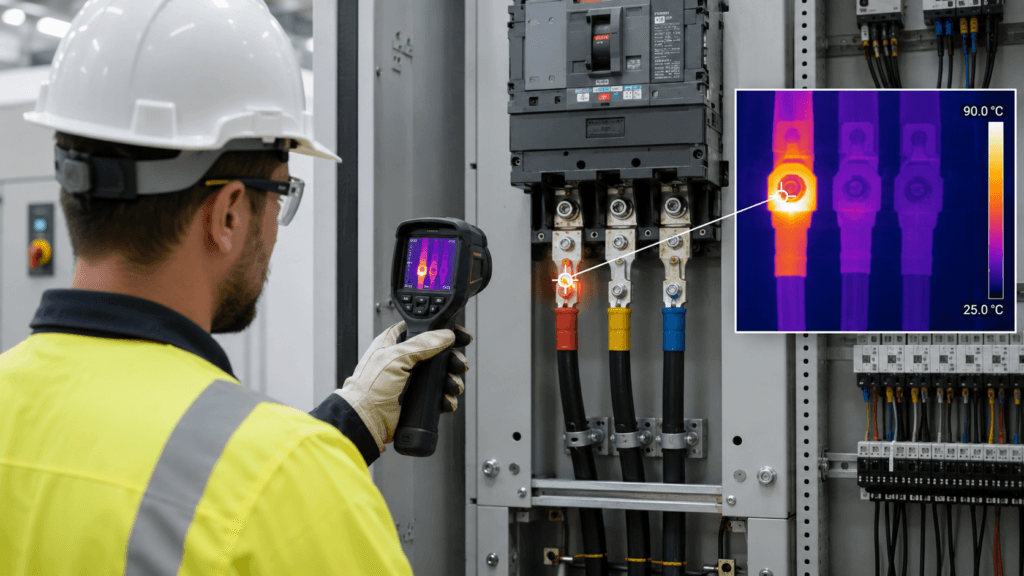
The current was within the normal range.
But one terminal was much hotter than the other two phases.
The first explanation was predictable:
“The load must be too high.”
That is possible.
But when only one connection is overheating while the phase currents are similar, I hesitate before blaming the load.
A hot terminal is often where an electrical problem becomes visible.
It is not always where the problem started.
The real cause may be a loose connection, poor crimping, oxidation, damaged contact surface, incorrect lug selection, uneven tightening, or repeated thermal cycling.
Before deciding that the equipment is overloaded, I prefer to ask:
If the current is normal, where is the resistance coming from?
Heat Alone Does Not Prove Overload
High current creates heat.
That is basic electrical behavior.
But a connection can also overheat because its contact resistance has increased.
Even a small increase in resistance can create significant local heating when current flows continuously through the connection.
This is why a cable may remain relatively cool while the lug, breaker terminal, or busbar joint becomes extremely hot.
The load current passes through the entire circuit.
But the heat appears at the weakest connection.
When evaluating a hot terminal, I do not look only at the absolute temperature.
I compare:
- Phase current
- Temperature of all three phases
- Similar terminals on the same equipment
- Ambient temperature
- Load duration
- Previous thermal images
- Signs of physical deterioration
The comparison is often more useful than one temperature value.
Compare the Three Phases First
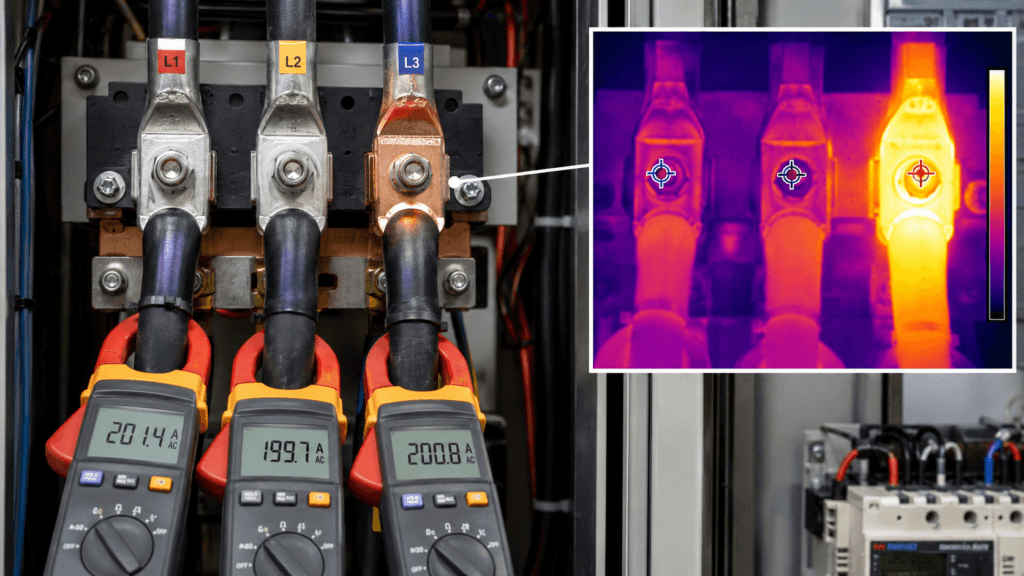
One of the fastest checks is comparing the three phase currents and terminal temperatures.
Imagine the following condition:
- Phase currents are nearly equal
- Two terminals are operating at similar temperatures
- One terminal is significantly hotter
That pattern does not immediately suggest overall overload.
It suggests a local problem.
Possible causes include:
- Loose terminal
- Poor cable-lug crimp
- Damaged or contaminated contact surface
- Oxidation
- Incorrect tightening torque
- Misaligned connection
- Damaged breaker terminal
- Cable strands cut during preparation
- Lug and cable size mismatch
If all three phases are similarly hot and the current is high, overload becomes more likely.
If one phase is hot while the current is balanced, the connection deserves closer attention.
A useful field question is:
Is the heat following the current, or is it concentrated at one physical point?
Thermal Images Need Context
A thermal camera gives valuable information.
But it does not give the root cause by itself.
A bright hot spot may look dramatic, but the image must be interpreted with operating conditions.
Before drawing a conclusion, record:
- Equipment load at the time of inspection
- Phase currents
- Ambient temperature
- Emissivity setting
- Distance and viewing angle
- Equipment operating duration
- Comparable phase temperatures
- Nearby heat sources
A temperature of 70°C may mean different things under different conditions.
It may be concerning when the adjacent phases are at 35°C.
It may be less surprising inside a high-temperature enclosure operating near design load.
The most useful value is often not the absolute temperature.
It is the temperature difference between comparable components under the same load.
That is why thermal inspection should be comparative.
One image alone can be misleading.
A repeated image under similar load conditions is much more useful.
A Loose Connection Does Not Always Look Loose
Not every bad connection can be identified visually.
A terminal may appear tight.
The bolt may not move easily.
There may be no obvious burning or discoloration.
But the actual contact surface may still be poor.
Possible reasons include:
- The lug was not fully seated
- The bolt reached mechanical resistance before proper contact pressure developed
- The conductor was poorly crimped inside the lug
- Oxide formed between contact surfaces
- The wrong washer or hardware was installed
- The terminal was tightened unevenly
- Repeated heating and cooling reduced contact pressure
- The conductor strands were damaged
This is why “it looks tight” is not enough.
Torque should be verified against the manufacturer’s requirement after the equipment has been properly isolated and made safe.
A live terminal should never be treated as a convenient place for experimental retightening.
The first priority is safe isolation, lockout, verification of absence of voltage, and qualified electrical work.
Check the Cable Lug and Crimp
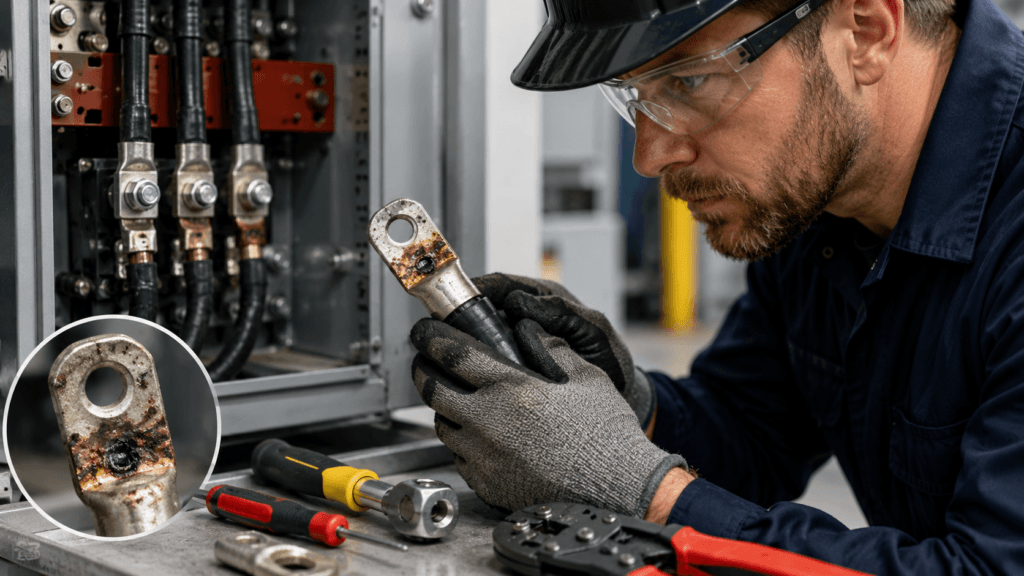
The cable lug is another common source of hidden resistance.
A poor crimp may carry current for months or years before the problem becomes obvious.
Over time, heating and cooling cycles can worsen the connection.
Things I check include:
- Correct lug size for the conductor
- Correct lug material
- Proper crimping die
- Number and position of crimps
- Cable strands fully inserted
- No damaged or missing strands
- No gap between insulation and lug barrel
- No visible movement between conductor and lug
- No discoloration or heat damage
A terminal problem is sometimes blamed on the breaker.
But the resistance may actually be inside the crimped connection.
Replacing the breaker without inspecting the cable lug can leave the real cause untouched.
Look for Heat Damage
Heat leaves evidence.
Even after the equipment has cooled, previous overheating may be visible.
Check for:
- Discoloration
- Darkened insulation
- Brittle cable insulation
- Melted plastic
- Carbon deposits
- Oxidation
- Damaged plating
- Deformed washers
- Heat marks on barriers
- Smell of burnt insulation
- Changes in terminal surface color
These signs help determine whether the heating was temporary or has been developing over time.
They also help identify how far the damage has spread.
A hot connection can damage more than the terminal itself.
It may affect:
- Cable insulation
- Breaker housing
- Adjacent control wiring
- Busbar insulation
- Protective barriers
- Nearby electronic devices
Corrective work should address the complete heat-affected area, not only the visible bolt.
Measure Voltage Drop Across the Connection
When it can be performed safely by qualified personnel, measuring voltage drop across a connection under load can provide useful evidence.
A healthy connection should have very little voltage drop.
An abnormal voltage drop across one terminal or joint may indicate increased resistance.
This is especially useful when:
- Phase currents are similar
- One phase is hotter
- The connection looks normal
- The fault cannot be confirmed visually
The measurement should be planned carefully.
It must use suitable instruments, appropriate PPE, safe test points, and established live-work procedures where live measurement is permitted.
The objective is not to take unnecessary risk.
The objective is to confirm whether the suspected joint is electrically different from the healthy phases.
Do Not Ignore Load Imbalance and Harmonics
A hot terminal is not always a local connection problem either.
Load conditions still matter.
Check for:
- Phase-current imbalance
- Neutral overcurrent
- Harmonic currents
- Intermittent high load
- Frequent starting current
- Cyclic process load
- Single-phasing conditions
- Unbalanced contact wear
- Poor power quality
A snapshot may show normal current even though the equipment experiences short periods of high current.
Review trends if they are available.
Ask whether the thermal image was taken during:
- Normal production
- Startup
- High-demand operation
- Batch transition
- Heater cycling
- Motor acceleration
- Peak utility demand
One normal current measurement does not prove that the load has always been normal.
Ask What Changed Recently
When a terminal suddenly becomes hot, recent work is a strong clue.
Ask:
- Was the cable replaced?
- Was the breaker changed?
- Was the lug reterminated?
- Was the panel cleaned?
- Was torque maintenance performed?
- Was the load increased?
- Was a larger motor connected?
- Was the cable moved or mechanically stressed?
- Was there water or condensation inside the enclosure?
Many hot-terminal problems appear after a physical change.
The work may have been completed correctly.
But it still changed the system and should be reviewed.
My Practical Field Review Sequence
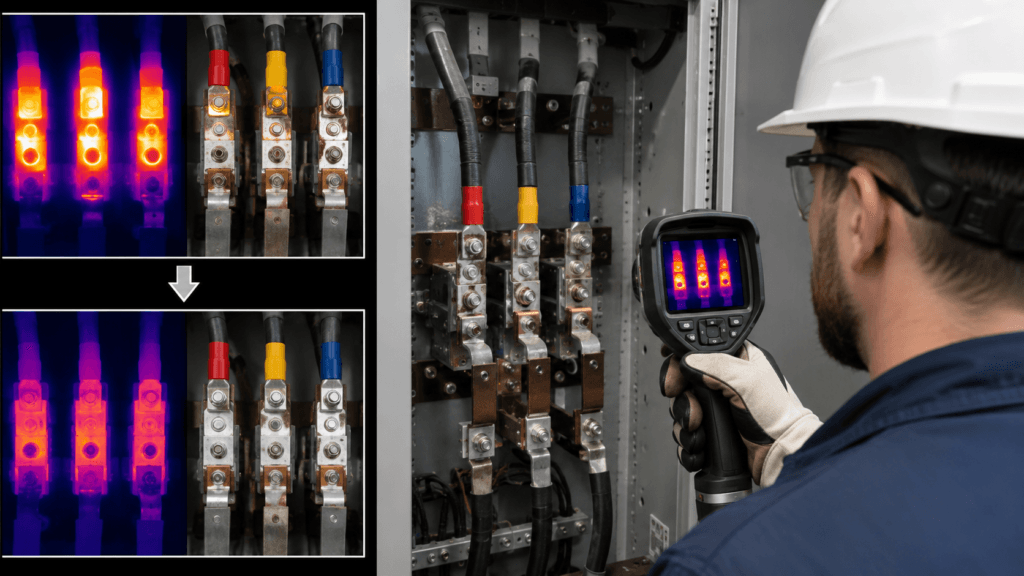
When I find an abnormal terminal temperature, I use a simple sequence.
1. Record the Condition
Capture the thermal image, visual photo, load current, ambient temperature, and operating condition.
Do this before disturbing the connection.
2. Compare All Phases
Compare phase current and temperature at equivalent points.
Look for local versus system-wide heating.
3. Review the Load History
Check whether the equipment experiences peaks, frequent starts, cycling, or recent load increases.
4. Identify the Exact Heat Location
Is the hottest point at:
- The cable
- The lug barrel
- The lug palm
- The terminal bolt
- The breaker connection
- The busbar joint
- The internal contact area
The location can narrow the likely cause.
5. Isolate the Equipment Safely
Apply approved shutdown, lockout, and verification procedures before touching the connection.
6. Inspect the Connection
Check torque requirements, lug condition, crimp quality, contact surface, hardware, corrosion, and heat damage.
7. Repair the Cause
Possible corrective actions include:
- Replacing the damaged lug
- Recrimping the cable
- Cleaning or replacing contact surfaces
- Replacing damaged hardware
- Correcting torque
- Replacing the breaker or terminal
- Repairing damaged cable insulation
- Correcting load imbalance
8. Verify the Repair Under Load
After returning the equipment to service, repeat the thermal inspection under comparable load.
Do not close the work order only because the terminal was tightened.
Confirm that the temperature difference actually decreased.
Shortcuts I Try to Avoid
“The Load Is High”
Check the actual phase currents and compare equivalent terminals before making this conclusion.
“Just Tighten It”
A loose connection may have already damaged the lug, terminal, plating, or insulation.
Retightening alone may not restore a reliable contact surface.
“The Breaker Is Bad”
The resistance may be in the cable lug, crimp, bolt, or busbar joint.
“The Temperature Is Below the Equipment Rating”
A large temperature difference between similar phases can still be an early warning.
“It Looks Fine Now”
Verify the repair under load with a follow-up thermal inspection.
Field Checklist: Hot Electrical Terminal
- Record thermal and visual images
- Record phase currents and ambient temperature
- Compare all three phases at equivalent points
- Review load peaks and operating history
- Identify the exact hottest location
- Check for discoloration, oxidation, and insulation damage
- Verify cable and lug compatibility
- Inspect crimp quality
- Check manufacturer torque requirements
- Inspect contact surfaces and hardware
- Review recent maintenance or modification work
- Check phase imbalance and harmonic conditions
- Measure connection voltage drop when safe and appropriate
- Repair the damaged components, not only the loose bolt
- Repeat the thermal inspection under comparable load
Final Thought
A hot terminal is evidence.
It is not yet a diagnosis.
The load may be high.
But the problem may also be concentrated resistance at a connection that should have remained cool.
Compare the phases.
Compare current with temperature.
Find the exact hot point.
Inspect the lug, crimp, contact surface, and hardware.
Then verify the repair under load.
Because in the field, the hottest point is often the weakest connection.
And the weakest connection is not always caused by the highest load.